

So, what exactly is an sample AWS Lambda function? Think of it as a small, self-contained piece of code that springs into action when a specific event happens—like a user uploading a file or an API call coming through. The best part? You don't have to manage any servers. It’s the perfect way to get your hands dirty with serverless computing, a model where you only pay for the exact compute time your code uses.
Why Serverless Computing Matters for Developers
Before we jump into writing code, it’s really important to understand why AWS Lambda has become such a game-changer for developers. At its heart, serverless computing lets you stop worrying about infrastructure and focus purely on writing application logic. You just package your code into a function, and AWS takes care of the rest—provisioning servers, scaling up or down, patching, and ensuring high availability.
This shift brings some serious advantages. Instead of paying for a server to sit around, potentially idle, waiting for requests, you move to a pay-per-use model. This means you’re only billed for the milliseconds your code is actually running, which can slash your operational costs.
Key Benefits of the Serverless Model
The serverless approach is about more than just saving money; it directly boosts developer productivity and makes your applications more resilient. By building a sample AWS Lambda function, you’ll see these benefits firsthand:
- Automatic Scaling: Lambda effortlessly scales your function based on incoming traffic. It doesn't matter if you get ten requests or ten thousand—it just works, no manual intervention needed.
- Reduced Operational Overhead: With no servers to manage, your team can pour their energy into building features that customers love instead of getting bogged down with system administration.
- Event-Driven Architecture: Your functions can be triggered by a whole ecosystem of AWS services. Think file uploads to Amazon S3, new entries in a DynamoDB table, or HTTP requests hitting an API Gateway.
Key Takeaway: The real magic of serverless isn't just "no servers." It's the power to build incredibly scalable, event-driven systems that react to business needs in real-time while cutting out the cost of idle resources. This model lets teams innovate faster and more efficiently.
This cost-efficiency and scalability make Lambda a fantastic choice for a wide range of tasks, from real-time data processing to building out backend services.
Of course, no technology is a silver bullet. It's good to be aware of some of Lambda's constraints, like its 15-minute maximum runtime or its default concurrency limits. Knowing these guardrails helps you design better solutions. For a deeper dive into these specifics, CloudZero.com offers some great insights.
AWS Lambda Pros vs Cons at a Glance
To give you a quick summary, here’s a look at the trade-offs when you're considering AWS Lambda for your projects.
| Key Benefit (Pro) | Potential Limitation (Con) |
|---|---|
| Pay-per-use pricing dramatically cuts costs for sporadic workloads. | A hard 15-minute timeout makes it unsuitable for long-running jobs. |
| Automatic scaling handles traffic spikes without any configuration. | Cold starts can introduce latency for infrequently used functions. |
| No server management means less operational work for your team. | Debugging can be more complex compared to a traditional server environment. |
| Seamless integration with the broader AWS ecosystem. | Concurrency limits can become a bottleneck without proper management. |
Ultimately, understanding both the strengths and weaknesses will help you decide if Lambda is the right fit. There’s no substitute for hands-on experience, and exploring our own journey can give you a clearer picture—you can learn more by checking out our insights on KP Infotech's expertise to see how these technologies are applied in real-world scenarios.
Setting the Stage: Environment and Python Code
Alright, with the theory out of the way, it's time to get our hands dirty and actually build something. Before we jump into writing our sample AWS Lambda function, we need to set up a proper workspace. This all starts with making sure your AWS account has the right permissions.
You'll need an IAM (Identity and Access Management) role with policies that grant permission to create and run functions. A common starting point is the AWSLambdaBasicExecutionRole. This role is crucial because it allows your function to write logs to Amazon CloudWatch, which you'll definitely need for debugging and monitoring down the road. Getting your IAM setup right from the start is a foundational piece for building any secure and functional serverless app.
Writing Your First Python Function
We’re going to use Python for our example, which is no big surprise. Python is the go-to language for 47% of Lambda developers, placing it well ahead of Node.js and Java. Its straightforward syntax and massive library ecosystem make it perfect for whipping up powerful functions quickly. If you're curious, you can dig into these Lambda usage trends on AWSInsider.net.
Our script will be simple but practical. It will take a JSON object as input, pull out a name, and then shoot back a personalized greeting.
Here’s the code we’ll be working with:
import json
def lambda_handler(event, context):
"""
A simple Lambda function that processes a JSON event
and returns a greeting.
"""
# Extract the name from the event payload
try:
name = event.get('name', 'World')
except AttributeError:
# Handle cases where the event is not a dictionary
name = 'World'
# Prepare the response
response_body = {
    "message": f"Hello, {name} from Lambda!"
}

# Return a structured HTTP response
return {
    'statusCode': 200,
    'headers': {
        'Content-Type': 'application/json'
    },
    'body': json.dumps(response_body)
}
This script defines the lambda_handler function, which is the non-negotiable entry point that AWS Lambda looks for when it executes your code. It accepts two arguments: event, which holds all the incoming data, and context, which gives you runtime information. This basic structure is the skeleton for any Lambda function you'll build.
Understanding how individual components like this function fit into the bigger picture is key. In many ways, the logical flow of backend code mirrors the visual organization of a user interface. For a deeper dive on that concept, check out our guide on structuring a web designing layout.
Getting Your Function Deployed with the AWS Console
Okay, you've got your Python script ready to go. Now for the exciting part: deploying your sample AWS Lambda function into the wild. We'll walk through the process using the AWS Management Console, which is the most straightforward, visual way to get started. It’s perfect for a first deployment because you can see every step without getting bogged down in command-line tools.
First things first, log into your AWS account, find the Lambda service, and hit "Create function." You'll see a few options on the next screen. For our purposes, we want to choose "Author from scratch." This option gives you a clean slate and complete control over the setup.
The whole process, from local code to a live function, is pretty simple.
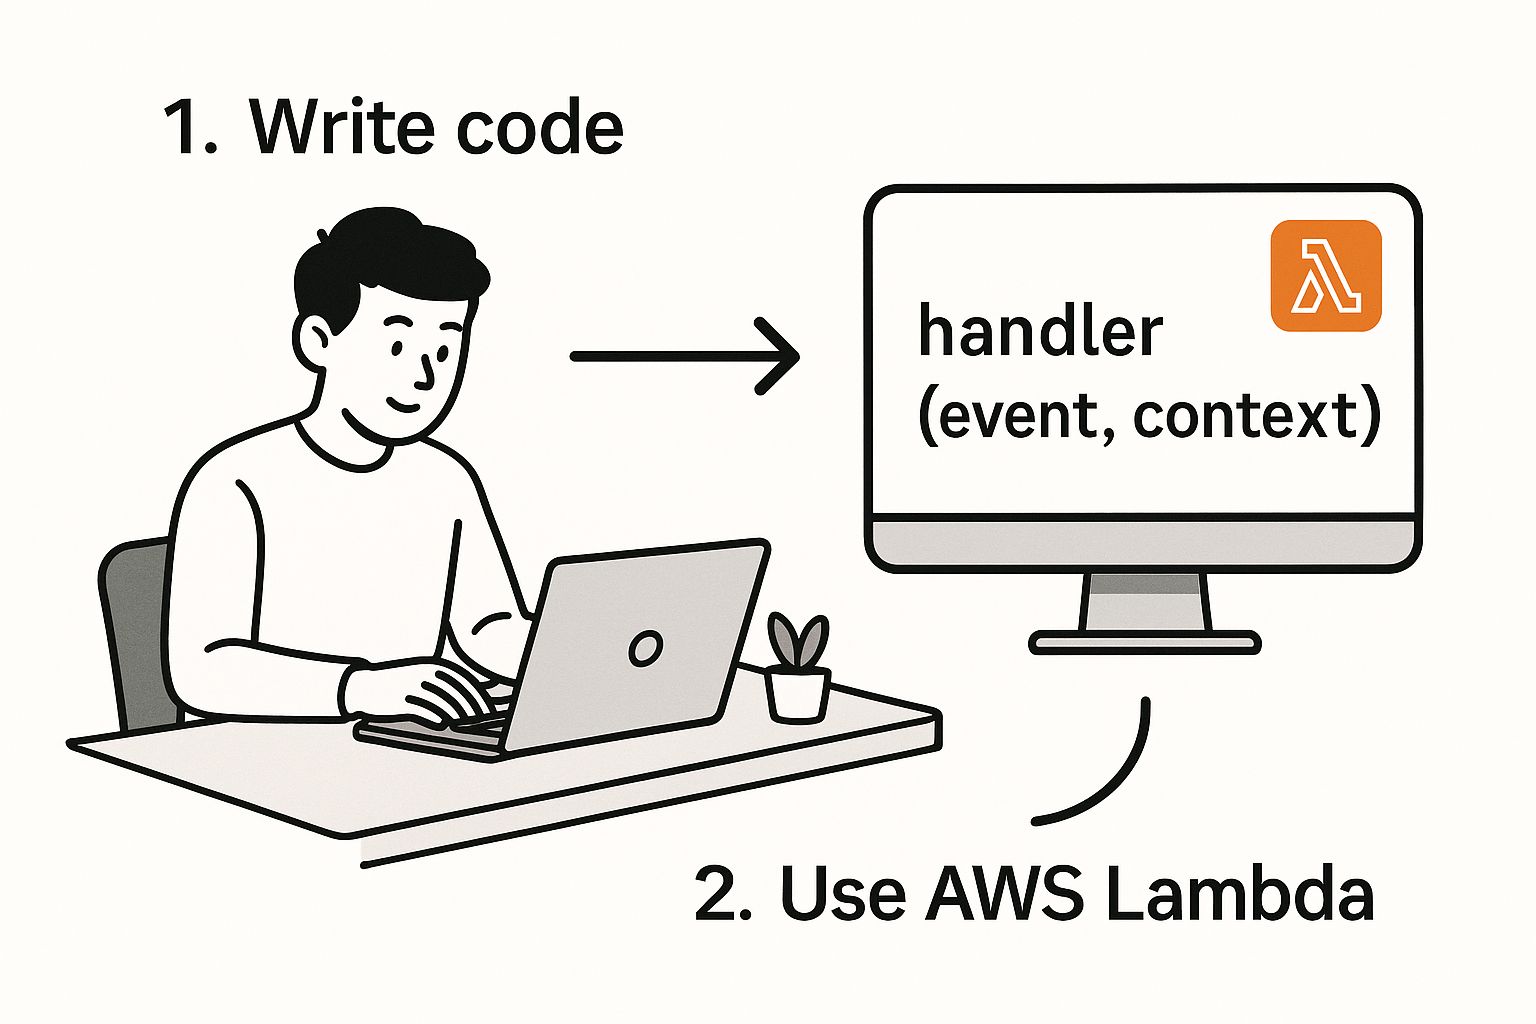
As you can see, the handler is the core piece of the puzzle—it's the exact function that AWS Lambda will call and run for you.
Function Configuration: The Details Matter
Now it's time to fill in a few configuration details.
- Function name: Pick something descriptive. I'll use
my-first-python-functionfor this example. - Runtime: From the dropdown, select the latest stable Python version. Sticking with a recent version is always a good practice for performance and security.
- Permissions: This is a crucial step. You need to set an execution role, which is just an IAM role that gives your function permission to do things. For now, the easiest path is to select "Create a new role with basic Lambda permissions." This is a safe default that automatically gives your function the ability to write logs to Amazon CloudWatch—something you'll definitely need for debugging later.
My Two Cents: The built-in code editor is fine for tiny scripts like this one. But once you start building real-world applications that use external libraries (like
requestsorpandas), you'll need to package your code and its dependencies into a .zip file and upload that instead.
Once the function is created, you'll be taken to its main dashboard. This is your command center for everything related to this specific function.
This is the main Lambda console page you'll be working from.
From here, you can manage your code, tweak configurations, set up tests, and monitor performance.
Scroll down to the "Code source" editor. You'll see some default boilerplate code from AWS. Just delete all of it and paste in the Python script we wrote earlier.
Finally, click the orange "Deploy" button right above the editor. And just like that, your code is saved and your function is live on AWS
Alright, you’ve deployed your function. That’s a huge milestone, but the job isn't done until you know it actually works in the wild. The next logical step is to test your sample aws lambda function right from the AWS console to make sure it handles incoming data exactly as you intended. This is where you confirm your logic and configuration are spot-on.
First, pop over to the "Test" tab in your function's console view. This is where the magic happens. We need to create what's called a test event—basically a JSON object that mimics the exact data your function would get from a real-world trigger. Since our simple function is just looking for a 'name' key, this will be quick.
Crafting Your First Test Event
In the "Test event" section, you'll need to configure a new event. Let's give it a memorable name, something like hello-world-test. Now, you'll see a JSON editor with some boilerplate code. Go ahead and replace all of that with our specific, simple payload:
{
"name": "Alex"
}
Once you've pasted that in, hit the "Save" button. Now, that hello-world-test event is saved for future use. Any time you want to run a quick check, just select it from the dropdown and click the big orange "Test" button.
After a moment, the console will spit back the results. You're looking for a green "succeeded" status. The output should show the statusCode, headers, and, most importantly, the body with our friendly "Hello, Alex from Lambda!" message. This immediate feedback is honestly one of the best things about working with Lambda—it makes iterating so much faster.
Pro Tip: Don't ignore the "Log output" section. It's a goldmine of information, showing you the exact execution duration, how much memory was used, and any
print()statements you peppered into your code. This is always my first stop for debugging or checking performance.
Digging Deeper with CloudWatch Logs
For more serious troubleshooting, you’ll need to go beyond the console output. Every single execution log gets automatically shipped to Amazon CloudWatch.
Just click on your function's "Monitor" tab and find the "View CloudWatch logs" button. This link will take you directly to the specific log stream for your function. Here, every single invocation is recorded, giving you a complete history to hunt down tricky bugs or analyze performance trends over time.
Optimizing Function Performance and Costs
Alright, you've got your sample AWS Lambda function deployed and running. That's a huge step! But getting a function live is just the beginning. The real goal for any serious, production-ready application is to make it run efficiently and cost-effectively. This is all about finding that perfect balance between raw performance and keeping your budget in check.
One of the first knobs you can turn is memory allocation. In the Lambda universe, memory and CPU power are tied at the hip. When you give your function more memory, you're also giving it a proportional slice of a more powerful CPU. The trick is to find that sweet spot where your function executes quickly without being over-provisioned, which is just a fancy way of saying you're paying for resources you don't need.
Tackling the Cold Start Problem
Another beast you'll hear a lot about is the infamous "cold start." This is the extra bit of latency you see when your function is invoked for the first time after it's been sitting idle. Behind the scenes, AWS has to fetch your code and spin up a whole new execution environment, and that adds a noticeable delay.
Key Insight: You can't completely get rid of cold starts, but you can definitely manage their impact. For critical, user-facing applications where every millisecond counts, you can use a feature called Provisioned Concurrency. It essentially keeps a set number of your function instances "warm" and ready to go, virtually erasing that startup lag.
For functions that aren't as time-sensitive, a simple but effective trick is to keep your deployment package as lean as possible. A smaller package means a faster startup time.
Understanding the Pricing Model
Finally, let's talk about the bill. Lambda's pricing is beautifully simple, based on two main things: the number of times your function is requested and how long it runs, measured in gigabyte-seconds (GB-seconds). This pay-for-what-you-use model is incredibly powerful for controlling costs. A well-tuned system can streamline workflows much like a good Odoo CRM setup brings order to customer data.
Keep an eye on the horizon, because a big update is coming. AWS recently announced that new billing standards for the function initialization (INIT) phase will take effect on August 1, 2025. On top of that, Lambda's ability to handle sudden traffic spikes has been supercharged—it can now scale up to 12 times faster, adding 1,000 concurrent executions every 10 seconds for each function. You can dive into the full details of these Lambda scaling and billing updates to get a better handle on your future costs.
Expanding Your Lambda Skills and Next Steps

Getting your first function deployed is a fantastic milestone. Seriously, take a moment to appreciate it. You've officially moved from building a simple sample AWS Lambda function to the brink of creating robust, event-driven applications that solve real-world problems.
The next logical move is connecting your function to the wider AWS ecosystem and getting your deployment workflow automated.
A great first step is to give your function a public face. By linking it to an Amazon API Gateway, you can instantly turn your code into a live HTTP endpoint. This is a game-changer. It means web browsers, mobile apps, or any other service can trigger your function with a simple API call, opening up a whole new world of possibilities for building backends and microservices.
Moving Beyond Manual Deployments
The AWS console is perfect for learning and quick tests, but when you're managing production applications, you need a more structured and repeatable process. This is where Infrastructure as Code (IaC) becomes essential.
Tools like the AWS Cloud Development Kit (CDK) or the Serverless Framework let you define your entire application—functions, API gateways, permissions, the works—right in your code. I've found this approach brings some huge advantages:
- Repeatable Deployments: Need to spin up an identical copy of your app in a new environment? It's just a single command away.
- Version Control: Your infrastructure lives in Git alongside your application code. This gives you a complete, auditable history of every change.
- Scalability: Managing hundreds of functions and their configurations suddenly becomes manageable and far less prone to human error.
Expert Insight: Let me be direct: embracing IaC is non-negotiable for any serious serverless developer. Clicking around in the console is fine for a one-off function, but it simply doesn't scale and invites costly mistakes. Automating your infrastructure is how you build reliable, production-grade systems.
As your applications get more complex, you'll also need to see what's going on under the hood. This is where observability comes in. Tools like AWS X-Ray give you deep insights into how your functions are performing and interacting with other services.
Good tracing is crucial for hunting down bottlenecks and troubleshooting issues in distributed systems. It's worth keeping up with the latest tracing behavior updates from AWS to get better control over how your functions are monitored. This journey—from a single function to a fully automated and observable application—is how you truly master serverless development.
When you're first diving into building with AWS Lambda, it's totally normal for a few questions to pop up. Getting your head around these common points early on can save you a ton of headaches and help you build much more efficiently. We've pulled together some of the most frequent queries to give you clear, straightforward answers.
Handling Dependencies
One of the first hurdles developers usually run into is managing dependencies. What do you do when your Python script needs external libraries, like requests or pandas? You can't just run a pip install on the Lambda environment itself.
The solution is to create a deployment package. This is just a .zip file that bundles your lambda_handler.py script right alongside all the library folders it needs to run. Once you upload this zip file, your function has access to everything it needs to execute properly.
Understanding Function Timeouts
Another common trip-up is the function timeout. By default, an AWS Lambda function will time out after only three seconds. This is often way too short for anything more complex than a "Hello, World!" and can cause your functions to fail unexpectedly.
Key Insight: Always configure a realistic timeout based on what your function is actually doing. If your code is making a network call to an external API, a timeout of 10-15 seconds is a much safer bet than the default. You can change this in a snap right in the function's configuration settings.
Can a Lambda Function Call Another Lambda Function?
Absolutely, and it’s a powerful pattern for building sophisticated serverless applications. You can invoke another Lambda function either synchronously (where you wait for a response) or asynchronously (a "fire and forget" approach) using the AWS SDK, such as Boto3 for Python.
This strategy lets you break down a large, monolithic process into a series of smaller, independent microservices that are much easier to manage and scale.
What About the Cost?
Finally, developers are always curious about the cost. The good news is that the AWS Free Tier is incredibly generous for Lambda. It includes:
- 1 million free requests per month
- 400,000 GB-seconds of compute time per month
This means you can build, test, and even run low-traffic applications without spending a dime. It’s the perfect sandbox for learning and experimentation.
To wrap things up, we've compiled a quick FAQ table to address a few more common questions you might have as you get started with your Lambda development journey.
Frequently Asked Questions
| Question | Answer |
|---|---|
| How do I manage environment variables? | You can set environment variables directly in the Lambda function's configuration. This is the best practice for storing sensitive information like API keys or database credentials, rather than hardcoding them. |
| Can I run code that isn't Python? | Yes, Lambda supports multiple runtimes, including Node.js, Go, Java, Ruby, and .NET. You can also create a custom runtime for any other language. |
| What's the best way to monitor my function? | AWS provides Amazon CloudWatch, which automatically collects logs, metrics, and traces from your Lambda functions. It's essential for debugging and monitoring performance. |
| Is there a size limit for the deployment package? | Yes, the deployment package (.zip file) has a size limit of 50 MB (zipped) and 250 MB (unzipped), including layers. |
Hopefully, these answers clear up some of the initial hurdles and give you the confidence to start building.
Ready to move beyond the sample and build a robust, scalable digital solution? The team at KP Infotech specializes in turning ideas into high-performance web and mobile applications. Let's build something amazing together.